How to Create a Mini Herb Garden in a Single Container on Your Balcony
Even the tiniest balcony can host a lush herb garden when you know how to combine multiple varieties in a single container. This guide walks you through choosing the right pot, selecting compatible herbs, and caring for your mini garden to keep fresh flavors just a snip away.
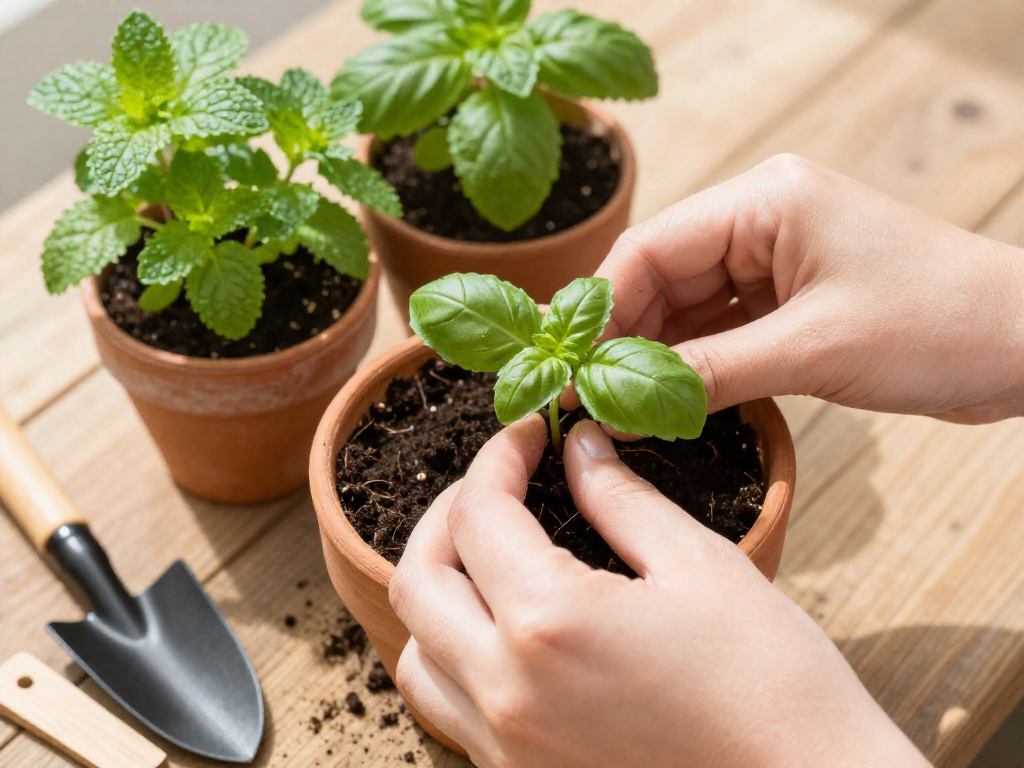
Picking the Perfect Container for Your Mini Herb Garden
Choosing the right container is the foundation of a thriving mini herb garden, and it’s easier than you might think. When you’re planning to grow four to five different herbs together, aim for a pot that’s at least 12 inches in diameter. This gives each plant enough room for its roots to spread out without competing too fiercely for water and nutrients. A container that’s also about 10–12 inches deep works best, allowing for healthy root development and reducing the need for constant watering.
Now, let’s talk materials—each has its own perks, and the best choice depends on your balcony’s conditions and your personal style. Terracotta pots are a classic favorite: their porous clay walls allow air and moisture to move through, which helps prevent soggy soil, but they do dry out faster, so you might need to water more often. They’re also heavier, which is something to keep in mind if you’re counting pounds. Plastic containers, on the other hand, are lightweight and excellent at retaining moisture—perfect if your balcony gets a lot of sun or you occasionally forget to water. Plus, they come in endless colors and styles that can imitate pricier materials. For the ultimate low-maintenance option, consider a self-watering planter. These have a built-in reservoir that lets herbs draw up water as needed, giving you a buffer against both under- and overwatering. No matter which material you lean toward, always check that it can withstand outdoor weather without cracking or fading.
One non-negotiable feature? Drainage holes. Without them, excess water pools at the bottom, leading to root rot—the fast track to sad, wilting herbs. If you fall in love with a pot that lacks holes, drill a few yourself (a simple task with a power drill and the right bit) or use a nursery pot with drainage placed inside the decorative one. Just be mindful not to let the inner pot sit in standing water.
Finally, think about weight. Apartment balconies often have strict weight limits, and a large terracotta pot brimming with damp soil can become surprisingly heavy. To stay safe, check your lease or building guidelines, and when in doubt, opt for lightweight plastic, resin, or fabric grow bags. You can even use a hand truck to move your planter easily if needed. The goal is to enjoy your fragrant herbs without any structural worries—after all, a peaceful balcony is the best kind of balcony.
Which Herbs Grow Best Together? (And Which to Avoid)
One of the biggest secrets to a thriving mini herb garden is putting the right plants together. When you're limited to a single container, you can't just toss in every herb you love—some will crowd out their neighbors, demand different amounts of water, or bolt before you've had a chance to enjoy them. Companion planting helps you avoid those problems from the start.
Start by grouping herbs with similar water and sunlight needs.
Think of your herbs in two main camps: Mediterranean and moisture-loving. Mediterranean herbs—rosemary, thyme, oregano, sage, and lavender—crave full sun and well-drained soil that dries out between waterings. They're drought-tolerant once established and will sulk if overwatered. On the other hand, basil, parsley, cilantro, and chives prefer consistently moist soil and can tolerate a little afternoon shade, especially in hot climates. Mixing a rosemary that likes it dry with a basil that wants damp feet is a recipe for one unhappy plant.
The mint warning
Mint is a wonderful balcony herb, but it spreads through underground runners and will quickly take over your entire container if you let it. The easy fix? Plant mint in a small nursery pot, then sink that pot into your larger container so the rim is level with the soil surface. This keeps its roots contained while still looking seamless in your display. Without this barrier, mint will bully your other herbs out of existence.
Herb combinations that actually work
Once you've sorted your herbs by water and sun needs, you can aim for these tried-and-true groupings:
- Basil + chives + tarragon – All appreciate regular moisture and partial sun. Basil and tarragon add lush foliage, while chives offer a vertical accent.
- Sage + rosemary + thyme – A classic Mediterranean trio. They thrive on neglect, so let the soil dry before watering deeply.
- Parsley + cilantro + dill – These annuals like evenly moist soil and cooler conditions. Be aware that cilantro and dill bolt quickly in heat, so harvest often or plant them in the shadiest part of the container.
Combinations to avoid
The worst mix-up is pairing an aggressive spreader with delicate growers. Mint is the obvious offender, but even oregano and some thymes can become bullies if not pruned regularly. Also steer clear of putting chives next to peas or beans in an herb container—while chives are generally friendly companions, they can inhibit legumes (though in a pure herb pot this rarely comes up). The simpler rule: if an herb sends out runners or tends to sprawl, give it its own submerged pot or dedicate a corner where you can ruthlessly trim it.
With a little planning, your single container can host a mini ecosystem that gives you fresh herbs for months. When in doubt, trust your senses—if something looks stressed, adjust its position or water routine, and don't be afraid to move things around next season.
Step-by-Step: How to Plant Your One-Pot Herb Garden
It's planting time! With your container ready and herb selection sorted, let's get those aromatic greens settled into their new shared home. Follow these simple steps, and you'll have a thriving mini herb garden in no time.
Begin by filling your container about two-thirds full with a quality, pre-moistened potting mix. Skip the garden soil—it's too heavy and can compact in containers, leading to poor drainage and unhappy roots. To pre-moisten, just add water gradually to the bagged mix and stir until it feels like a damp sponge. This encourages even hydration and prevents dry pockets later.
Now, do a quick visual layout before you remove any plants from their nursery pots. As a rule of thumb, place taller, upright herbs like rosemary or sage in the center if your pot will be viewed from all sides, or towards the back if it’s against a wall or railing. Then position trailing or spreading herbs such as oregano, thyme, or creeping rosemary near the edges, where they can softly spill over the sides. This arrangement gives every plant room to grow, ensures even light exposure, and creates a beautiful layered look.
Starting with the tallest herb, gently remove it from its pot, loosen the root ball with your fingers—especially if it’s root-bound—and settle it into the soil at the same depth it was growing before. Repeat for the remaining herbs, leaving about 3 to 4 inches of space between them. That might seem roomy now, but it allows vital air circulation and prevents overcrowding as they fill out. Once all plants are in place, fill the gaps with more potting mix, pressing the soil lightly around each one. You want the contact to be firm enough to eliminate large air voids but still loose enough for roots to expand with ease.
Finally, give your new mini garden a generous, slow drink of water. Pour until you see it trickle freely from the drainage holes—this signals that moisture has reached the entire root zone. If the soil settles, add a bit more mix to level it out. Set your container on a waterproof saucer if needed, and you’re done.
Balcony Care Tips for a Thriving Mini Herb Garden
Now that your one-pot herb garden is planted, a little daily attention will keep it lush and productive in your balcony microclimate. Balconies can be windier and hotter than ground-level gardens, so your container herbs will need consistent care.
Watering: Keep Roots Happy, Not Soggy
Start by checking the soil moisture every morning. Push your finger into the mix up to the first knuckle; if it feels dry, it’s time to water. During a heatwave, check twice – morning and late afternoon – because balconies can dry out fast. Water thoroughly until you see it drain from the bottom, then empty any saucer to prevent root rot. In cooler or cloudy spells, ease off to avoid waterlogging.
Maximizing Sunlight on a Balcony
Most culinary herbs crave at least six hours of direct sun, but your balcony’s orientation may limit that. Observe how light moves across your space. If full sun is scarce, place the pot in the brightest spot and rotate it a quarter turn once a week. This ensures all sides get even light and prevents leggy, one-sided growth. For deeper shade, focus on shade-tolerant herbs like mint, parsley, or chervil – but even they need bright indirect light.
Feeding for Flavor Without Going Overboard
Herbs in containers exhaust nutrients faster than in-ground plants. Feed with a balanced, liquid organic fertilizer every two weeks during the growing season. Dilute it to half the recommended strength: too much fertilizer can push rapid, lush growth at the expense of essential oils, dulling the flavor. If you notice pale leaves or slow growth, try a seaweed or fish emulsion for a gentle boost.
Keeping Pests at Bay Naturally
Watch for unwelcome visitors like aphids (clustered on new growth) and spider mites (fine webbing and speckled leaves). A strong spray of water can knock off aphids, but on a balcony that’s messy; instead, keep a ready-mixed neem oil spray. Apply it early morning or evening to avoid leaf burn. For prevention, wipe leaves occasionally with a damp cloth to remove dust and check the undersides. Good air circulation helps, so don’t crowd the pot with decorations.
With these simple habits, your balcony herb garden will stay healthy, bounce back quickly, and supply you with fresh flavors for months.
Harvesting Without Harming: How to Pick So Plants Keep Producing
Harvesting your balcony herbs is a joyful moment, but how you snip matters just as much as when. The goal is to keep plants full, healthy, and producing for months—not pluck them bare. Think of each cut as a gentle encouragement for new growth.
Always start with the outer, older leaves. Using clean, sharp scissors or your fingertips, snip stems just above a leaf node (where a pair of leaves meets the main stem). This triggers the plant to branch out, creating a bushier shape. A safe rule: never take more than one-third of the plant at a time. Overharvesting shocks the roots and stalls regrowth, especially in a container’s limited space.
You’ll notice tiny flower buds forming on herbs like basil, cilantro, and mint as days get longer. Pinch these off promptly. Bolting—when a plant shifts energy to flowering and seed production—turns leaves bitter and tough. By removing buds early, you redirect the plant’s vigor back into tender, aromatic foliage.
Timing your harvest matters for flavor. Early morning, just after the dew has dried, is ideal. Leaves are plump with essential oils, giving you the most intense taste. Avoid harvesting in the heat of the day, when water stress can wilt both you and your herbs.
Understanding the difference between annual and perennial herbs helps you harvest without harming their long-term form. Annuals like basil and cilantro benefit from frequent, light cutting; they’ll keep pushing out new leaves until they exhaust themselves. You can cut stems back by a third weekly during peak growth. For perennials such as rosemary, thyme, and oregano, focus on snipping soft green tips rather than cutting into woody stems. Taking too much from old wood can hinder future growth. Instead, prune just enough to shape the plant and encourage fresh shoots.
Harvest regularly, even if you don’t need the herbs immediately. This keeps plants from becoming leggy and stimulates constant renewal. With thoughtful snipping, your mini container garden will reward you all season—snipping by snipping.
Creative Ways to Display and Label Your Balcony Herb Planter
Your mini herb garden does more than provide fresh flavors—it’s a little piece of living decor that can reflect your style. With a few simple touches, you can turn a single container into a Pinterest-worthy centerpiece while keeping track of what’s growing.
Clear labeling is not only practical; it helps you remember each herb and makes it easier to share your garden with others. Try writing names on bamboo stakes with a permanent marker for a natural look. If you’re feeling crafty, paint a section of the pot with chalkboard paint and use chalk to label directly on the planter—easily changeable as herbs rotate. For an elegant, long-lasting option, use copper plant tags etched with a ballpoint pen or metal stamp. These small details also catch the eye in photographs, boosting engagement when you pin your garden online.
Decorating the container itself adds personality. Cover a plain terracotta pot with mosaic tiles broken from old dishes, or use stencils and outdoor paint to create a pattern that matches your balcony’s color scheme. A single coat of vibrant, weather-resistant paint in a shade like turquoise or sunny yellow can brighten the whole space. Just make sure any materials are safe for plants and sealed to withstand the elements.
Styling elevates the presentation even further. Set the planter on a small wooden stool or a vintage crate to give it height and definition. Position it next to a bistro table where you can enjoy morning coffee surrounded by fragrance. For evening ambiance, weave battery-operated fairy lights around the container or drape them above—their soft glow turns your herb garden into a magical corner.
Remember, a well-labeled and beautifully displayed planter invites admiration both in person and in photos. When you snap that perfect shot for social media, the legible tags and thoughtful styling make your garden stand out, inspiring others to start their own balcony oasis.
FAQ
Can I start all the herbs from seed in the same pot?
It's possible, but herbs have different germination times and growth rates, which can make maintenance tricky. Since basil sprouts quickly and oregano slowly, starting them separately in small plugs or using transplants is often more reliable. If you do sow together, choose seeds with similar needs and thin early to avoid overcrowding.
How often should I water my mini herb garden on a balcony?
Check the soil daily by feeling the top inch—water thoroughly when it's dry. Container herbs on a balcony dry out faster due to wind and sun, so in hot weather you might need to water once a day or more. Ensure good drainage to prevent root rot, and always water at the soil level to keep foliage dry.
What if my balcony only gets partial sun?
Many herbs tolerate partial sun, especially leafy ones like mint, parsley, chives, and cilantro, which need about 4-6 hours of sunlight. Mediterranean herbs like rosemary and thyme prefer full sun, so place the container in the brightest spot you have and rotate it weekly for even growth. Supplementing with a grow light can also help if light is very limited.
How do I keep mint from taking over the container?
Plant mint in a small plastic pot submerged in the larger container to contain its aggressive runners. Alternatively, you can grow mint in its own separate pot completely, as it spreads via underground stems. Regular harvesting and trimming also keep it in check.
Can I bring this one-pot herb garden indoors for winter?
Yes, many herbs can transition indoors if you provide a sunny windowsill or a grow light. Acclimate them gradually by bringing them inside for longer periods over a week to reduce shock. Keep them away from cold drafts and heating vents, and reduce watering as growth slows in lower light.