Fall Cleanup: Prepare Your Balcony for Winter
Don't let winter sneak up on your balcony garden. A thorough fall cleanup not only protects your plants and gear but also sets you up for an easy spring start. Here's your step-by-step checklist.
Assess and Declutter Your Balcony
A clear, uncluttered balcony is the perfect foundation for winter prep. Begin by taking a slow walk around your space and really looking at everything—plants, pots, furniture, and tools. Grab a notepad or use your phone to jot down anything that’s damaged, worn out, or simply no longer serving you. This is your chance to reset the balcony and set yourself up for an easy start next spring.
Follow these steps to declutter efficiently:
- Spot the trouble spots: Check for cracked pots, rusted plant stands, frayed hangers, or anything that could become a safety hazard in winter winds. Make a pile for repairs and a separate one for items that need to be discarded.
- Clear out fading growth: Annuals and vegetable plants that have finished their cycle should come out now. Empty their pots and store them upside down to prevent water from pooling and freezing, which can crack containers. Compost healthy plant material and toss anything diseased.
- Gather and sort small items: Collect tools, decorative pieces, watering cans, and trellises. Group them by what you’ll keep on the balcony (if any) and what will move indoors. Smaller items are easy to lose once snow or ice arrives, so tucking them away now saves headaches later.
- Document your starting point: Snap a few “before” photos from different angles. Not only does this give you a satisfying record of your cleanup, but it’s also great for sharing your progress on social media and inspiring fellow balcony gardeners.
By the end of this mini audit, you’ll have a tidy, intentional space that’s ready for the next steps in winterizing—and you’ll already feel a sense of accomplishment.
Tackle Leaves, Dirt, and Debris
Clearing away fallen leaves, built-up dirt, and stray debris is more than just tidying up—it’s a critical step to prevent winter damage. When organic matter sits on your balcony, it traps moisture, invites mold and mildew, and creates cozy hideouts for pests. Damp debris can also clog drains, leading to standing water that may freeze and crack surfaces. Here’s how to do it right:
- Start by sweeping every surface, including the floor, corners, and under furniture. A cordless leaf blower works well too, especially for tight balcony spaces. Make sure to get into the nooks where leaves accumulate.
- Check your balcony’s drains and any gutters. Remove leaves and sludge so meltwater and rain can flow freely. Clogged drains turn into ice patches when temperatures drop.
- As you collect plant debris, inspect for any signs of disease—like powdery mildew or black spots. Toss these into the trash, not your compost, to avoid spreading pathogens.
- After clearing dry debris, give the floor and railings a gentle scrub with a mild soap solution if you notice sticky residue or grime. Rinse thoroughly and, if possible, let everything dry completely to prevent moisture from lingering.
By taking the time now, you’ll step into spring with a clean, safe balcony ready for new growth.
Protect Perennials and Hardy Plants
Even cold-tolerant container plants need extra care on a balcony, where pots expose roots to more freezing and thawing than in-ground gardens. With a few simple steps, you can help your perennials and hardy shrubs survive winter and bounce back in spring.
Start by moving tender perennials to the most sheltered spot you have—against an exterior wall or under a small overhang. This buffers them from wind and the worst of the frost, often making a 5–10°F difference on chilly nights.
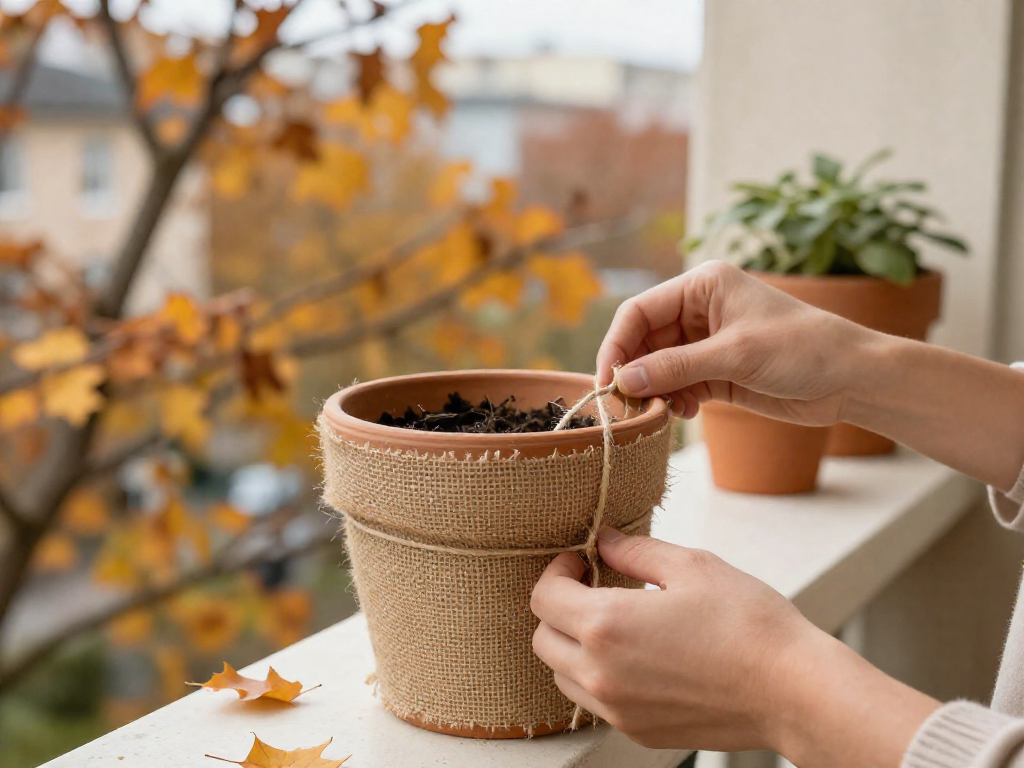
Next, cluster your pots together. Grouped containers create a warmer microclimate and protect one another’s sides from direct cold exposure. Wrap the outside of the cluster with burlap, old blankets, or bubble wrap, securing it with twine. This insulation shields the root zone from sudden temperature swings.
Apply a 2–3 inch layer of mulch on top of the soil in each pot. Straw, shredded leaves, or wood chips work well to lock in moisture and regulate soil temperature. For extra-sensitive plants, consider investing in a simple cold frame or using cloches—bell-shaped covers—on nights when a hard freeze is forecast. These act like mini greenhouses, trapping daytime warmth and keeping frost off foliage.
Finally, remember that watering needs drop dramatically in winter. Give plants a deep drink before a freeze if the soil is dry, but then water sparingly to avoid soggy roots that are prone to rot in cold conditions. With these precautions, your balcony perennials will rest comfortably through winter, ready to thrive again next season.
Winterize Containers and Soil
Your pots and soil have worked hard all season—now it's time to tuck them in properly so they're ready to go next spring. With just a little effort, you'll save money and avoid last-minute trips to the garden center.
Start by emptying all annual containers. Shake out the old potting mix into a compost pile or green waste bin. If the soil looks healthy—no signs of pests or disease—you can store it dry in a lidded bin or heavy-duty trash bag for reuse. Label the bag with the date and what it was used for, so you remember later.
Important: If any plant showed signs of disease (like powdery mildew, root rot, or leaf spots) or you spotted pests (aphids, fungus gnats, etc.), discard that soil immediately. Do not compost it or reuse it—the pathogens or eggs can overwinter and infect next year's plants.
Now, give those empty pots a good cleaning. Dirt and mineral buildup can harbor problems. Prepare a mild bleach solution: one part household bleach to nine parts water. Scrub the inside and outside of each container with a stiff brush, let it soak for 10–15 minutes, then rinse thoroughly with clean water. For terracotta or unglazed ceramic, this step prevents cracking by removing salts that absorb moisture and freeze. If you prefer a non-bleach alternative, use a 50/50 mix of white vinegar and water, but bleach is more effective at killing pathogens.
Once the pots are completely dry, stack them upside down (to keep out moisture and critters) in a sheltered spot—like a storage bench, closet, or under the eaves. If you must leave them outdoors, cover the stack with a tarp or plastic bin to prevent ice and snow from collecting inside. For glazed ceramic or plastic, freezing water can cause cracking, so it's better to move them indoors if possible. Even a small balcony can accommodate a tidy tower of pots tucked in a corner.
Take a few extra minutes to organize your drip trays, saucers, and decorative outer pots. Scrub those too, and store them nested together. Come spring, you'll be thrilled to have everything clean and ready to go.
Store Furniture, Cushions, and Decor
Your balcony furniture and decor have worked hard all season, so let’s tuck them in safely for winter. A bit of prep now prevents rust, mold, and cracking, so you can enjoy them again next spring without surprises.
Start with fabric cushions and pillow covers. Even if they’re labeled outdoor-grade, lingering moisture can lead to mildew over the cold months. Use a mild soap and water to spot-clean any stains, then rinse thoroughly and let everything dry completely in the sun or a well-ventilated spot. Once dry, seal them inside sturdy plastic bags or storage bins with lids. Tuck in a silica gel pack if you have one—it’s an easy extra to absorb any sneaky humidity.
For furniture, think compact. If your bistro set or chairs fold or can be disassembled, take them apart to save space. Wipe down metal frames with a damp cloth to remove salt and grime, then dry completely. If you have a shed, basement, or even a dedicated corner inside an entrance closet, that’s ideal. No indoor spot? Group pieces together and cover with a breathable, waterproof furniture cover—avoid plastic tarps that trap condensation.
Don’t forget the moving parts. Folding chairs, umbrellas, and adjustable loungers often have hinges and joints. A quick spray of a silicone-based lubricant (or even a dab of petroleum jelly) on the mechanisms will keep them from seizing up over winter. Work it in by opening and closing a few times, then wipe away any excess so it doesn’t attract dirt.
Finally, bring delicate decor indoors. Ceramic pots, glass lanterns, wind chimes, and hand-painted signs can crack or shatter when temperatures plunge. Wrap them in newspaper or bubble wrap and store in a sturdy box. If you love the look of a few decorative pieces even in winter, consider swapping them for frost-resistant alternatives—think metal, resin, or treated wood.
A little elbow grease now means your balcony stays clutter-free and your belongings stay in great shape for cozy winter nights and the return of spring.
Shut Down Irrigation and Water Systems
Even a light freeze can burst hoses and fittings, so taking a few minutes now will save you from repairs next spring. Start by turning off the water supply to any outdoor spigots you control. Then, disconnect all hoses from the faucet and any connectors. Drain them completely by holding one end low to let gravity do the work, then coil them loosely and store indoors or in a frost-free spot.
If you run a drip irrigation system on your balcony, you’ll want to clear the lines of any leftover water. A simple way is to disconnect the system from the hose bib, open the end caps, and let the tubing drain naturally. For extra peace of mind, you can use a compressor set to low pressure (around 30 psi) to blow out any remaining moisture—just be gentle so you don’t damage the emitters.
Don’t forget the exposed faucet itself. Even if it’s labeled “freeze-resistant,” it’s smart to add a foam faucet cover. These cheap insulators easily slip on and provide a protective layer against sudden cold snaps. If your balcony spigot isn’t frost-proof, consider shutting off its indoor valve and draining the pipe if possible.
Finally, remove any automatic timers, backflow preventers, or splitters attached to the faucet. Take out the batteries from digital timers and store everything in a dry place. A small zippered bag keeps all the pieces together so you’re not hunting for washers and gaskets come spring. By shutting down your water system completely, you’ll avoid the headache of frozen pipes and cracked hoses—and your setup will be ready to go once warmer weather returns.
FAQ
How do I protect balcony plants without an indoor space?
Cluster pots together against a wall for shared warmth and wind protection. Cover them with frost cloth, burlap, or bubble wrap, and add a thick layer of mulch to insulate roots. A small cold frame or clear storage bin can create a temporary mini greenhouse.
Can I leave ceramic pots outside all winter?
Most ceramic pots are vulnerable to cracking if water freezes inside them. Empty the pots and store them in a sheltered spot, or ensure excellent drainage and wrap them in insulating material. If possible, switch to frost-resistant containers for season-long outdoor display.
What’s the best way to clean balcony floors without damaging them?
Start by sweeping away debris, then use a mild soap-and-water solution with a soft-bristle brush. Avoid harsh chemicals or pressure washing, which can harm surfaces and harm nearby plants. For wood, use a cleaner specifically designed for decks.
Should I trim back perennials in the fall or wait until spring?
It depends on the plant. Leave ornamental grasses and hollow-stemmed perennials for winter interest and beneficial insects. Trim only dead or diseased growth in fall to prevent pests and disease, but delay major cutting back until early spring for added cold protection.
How do I winterize a self-watering planter?
Drain all water from the reservoir to avoid ice damage, and remove any wicking components. Store the planter in a dry, sheltered location, or if left outdoors, tip it on its side and cover with a waterproof tarp. Clean it thoroughly before reuse to prevent mineral buildup.