Spring Repotting Guide for Balcony Plants
Spring is the season of renewal, and your balcony garden is no exception. After a long winter, your potted plants may be root-bound or depleted of nutrients. In this step-by-step guide, we'll show you exactly when and how to repot your balcony plants for lush, healthy growth. From choosing the right soil to picking the perfect pot size, you'll learn everything you need to give your urban oasis a fresh start.
Why Repot Balcony Plants in Spring?
Spring is nature’s fresh start, and for your balcony plants, it’s the perfect time to repot. As days grow longer and temperatures rise, you’ll see your plants waking up with new leaves and shoots. This burst of active growth helps them recover quickly from the shift, making spring repotting far less stressful than doing it in the dormant winter months.
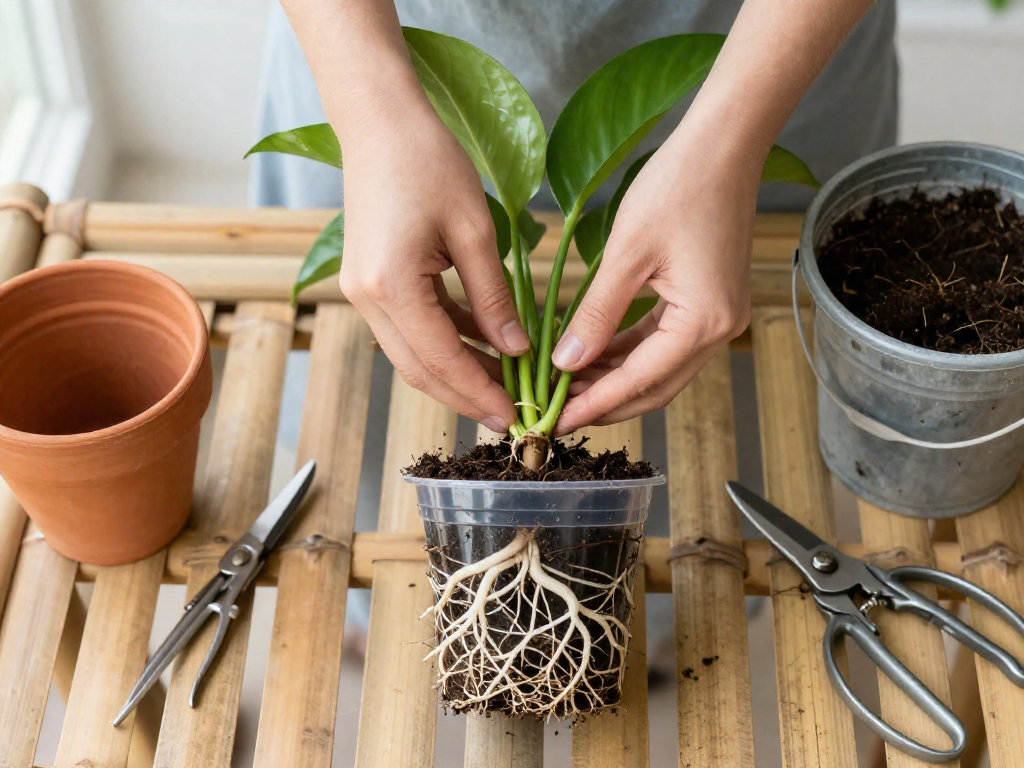
How do you know a plant needs a new home? Keep an eye out for telltale signs of being root-bound. Gently slide the plant out of its pot—if you see roots tightly circling the soil mass or growing through the drainage holes, it’s time. You might also notice water rushing straight through without soaking in, or the plant’s growth stalling despite good care. Leaves may yellow or wilt more often because the crowded roots can’t take up enough water and nutrients.
Even if your plant hasn’t outgrown its container, spring repotting brings important benefits. In a small balcony setting, container soil tends to compact over a season, reducing air pockets that roots need to breathe. Repotting lets you work in fresh potting mix rich in organic matter, restoring drainage and delivering a renewed supply of nutrients. Think of it as giving your plant a nutrient-packed breakfast to power a productive growing season.
When you do see those circling roots, resist the urge to jump to a massively bigger pot. A container just one or two inches wider in diameter is usually ideal—too much soil can stay soggy and lead to root rot. A slightly larger space gives roots room to expand without overwhelming them, allowing your balcony garden to stay lush, healthy, and balanced.
Choosing the Right Pot and Soil for Balcony Containers
The right pot and soil combination is the secret to thriving balcony plants. When it’s time to repot, choose a pot that’s just 1 to 2 inches wider in diameter than the current one. Going oversized might seem generous, but too much extra soil holds moisture that roots can’t reach, leading to waterlogging and root rot—especially on a breezy balcony where the top layer dries out quickly while the bottom stays soggy.
Always make sure your container has drainage holes. If you fall in love with a pot that’s hole-free, use it as a decorative cachepot or carefully drill a few openings. A layer of gravel or broken pottery shards at the bottom is a tried-and-true trick to keep soil from washing out and to encourage excess water to flow freely. While some debate its effectiveness for overall drainage, it can still be useful on a balcony to maintain a tidy setup.
Next, the soil: skip heavy garden soil, which compacts easily and becomes dense when wet—a double problem when you need to move pots around. Instead, choose a high-quality, lightweight potting mix formulated for containers. Look for blends with peat moss, coconut coir, or perlite to guarantee excellent drainage and aeration. Before planting, moisten the mix slightly so it’s evenly damp; this helps it settle around the roots without creating dry pockets.
To give your plants a gentle nutritional boost from the start, mix in a handful of slow-release fertilizer pellets. These little beads provide a steady supply of nutrients for several weeks, so you won’t have to fuss with frequent liquid feeding—a real time-saver for busy urban gardeners.
A final balcony-specific tip: think about weight. Plastic or resin pots are ideal if you’re working with a small balcony where every pound counts. If you prefer the look of ceramic, consider fiber clay or composite materials that mimic the look without the heft. Place pots on lightweight saucers and add pot feet to protect your balcony floor while promoting air circulation underneath. With these thoughtful choices, your repotted plants will settle into their new homes with gratitude, ready to flourish all season long.
Step-by-Step Repotting Process for Balcony Plants
It's repotting day—time to give your balcony plants fresh soil and room to grow. With a little preparation and these simple steps, you'll have them settled into their new homes in no time.
1. Pre-water your plant. About an hour or two before you plan to repot, give your plant a light drink. Slightly moist soil holds together better and makes it easier to slide the root ball out without damaging the roots.
2. Ease it out and inspect the roots. Turn the pot on its side or upside down, supporting the plant with one hand, and gently coax it out. If it’s stuck, tap the sides or run a knife around the inside edge. Once free, gently loosen the outer roots with your fingers. If you see any roots that are dark, mushy, or circling tightly, snip them off with clean scissors or pruners. This encourages healthy new growth.
3. Settle into the new pot. Place a layer of fresh, well-draining potting mix in the bottom of the new container—enough so the plant will sit at the same depth it was in its old pot. Center the plant and fill in around the sides with more mix, pressing lightly to eliminate air pockets. Leave about an inch of space below the rim to prevent soil from spilling when you water.
4. Water deeply and let it drain. Give your freshly potted plant a thorough soaking until water runs freely from the drainage holes. This helps the soil settle around the roots. Let the pot drain completely before returning it to its saucer or decorative outer pot. On a balcony, it’s smart to do this over a tray or even in the sink to avoid puddles on your balcony floor.
Take your time, work on a tarp or towel to catch spills, and remember—repotting is a skill you’ll get better at every season. Your plants will thank you with vigorous summer growth.
Aftercare Tips for Newly Repotted Plants
Your freshly potted balcony plants need a little extra love right after repotting to settle in and thrive. Think of it as a recovery period after a big change. Here’s how to help them bounce back beautifully.
Find a Gentle Spot for the First Few Days
After repotting, plants often experience transplant shock. Ease this by placing them in a shaded or low-light area on your balcony for about 3–5 days. Direct sun can be harsh on stressed roots and leaves, so a spot with bright but indirect light is perfect. Once they perk up, you can gradually move them back to their usual sunny spot.
Water with Care
Resist the urge to water right away unless the new potting mix was already dry. Check the soil—water only when the top inch feels dry to the touch. Overwatering can suffocate roots that are trying to stretch into their new space. Stick your finger in to gauge moisture; it’s a simple habit that prevents soggy soil problems.
Hold Off on Fertilizer
Those roots need time to establish before they can handle a nutrient boost. Adding fertilizer too soon can burn tender new growth. Wait at least 2–4 weeks before feeding. When you do start fertilizing, use a balanced, gentle formula at half-strength to avoid overwhelming your plant.
Watch for Signs of Stress
Keep an eye out for wilting, yellowing leaves, or drooping stems. Some mild stress is normal right after repotting, but if it persists, try adjusting the light level or humidity. Move the plant a bit closer to or further from the sun, or group it with others to raise humidity. Over the next week or two, gradually reintroduce it to its standard care routine—your plant will signal when it’s ready.
With these simple aftercare steps, your balcony garden will look lush and happy in no time. You’ve got this!
Common Repotting Mistakes to Avoid on a Balcony
Even with the best intentions, balcony gardeners can stumble into a few common repotting pitfalls. Knowing what to watch for will help your plants settle in happily and avoid unnecessary stress.
Skipping drainage holes. On a balcony, where humidity can linger and airflow might be limited, a pot without drainage is a recipe for root rot. Always choose containers with holes, or carefully drill your own if you fall in love with a decorative cachepot. Using a pot liner? Make sure it doesn’t trap water inside.
Choosing a pot that’s too large. It’s tempting to give roots plenty of room, but oversized containers hold moisture that the plant can’t yet absorb, leading to soggy soil and suffocated roots. Go up just 1–2 inches in diameter from the current pot to encourage healthy, gradual growth.
Reusing old soil without amending. Spent potting mix can compact, lose nutrients, and harbor pests or disease. Even if the soil looks okay, blend in fresh compost or a quality potting mix to restore structure and fertility. Your plants will thank you with vigorous spring growth.
Repotting on a scorching hot day. Exposed balconies can bake in direct sun, and ripping a plant from its pot in peak heat adds shock. Aim for a mild morning or cloudy afternoon when you can work comfortably, and the plant will recover with less wilting.
A little awareness goes a long way. By avoiding these missteps, you’ll give your balcony garden the best start for a lush, vibrant season ahead.
Repotting Special Balcony Plants: Succulents, Herbs, and Vines
Different balcony plants have unique repotting needs. Here’s how to handle some of the most popular ones.
Succulents and Cacti
Succulents need excellent drainage to thrive, so choose a fast-draining cactus or succulent mix. Unglazed terracotta pots are ideal—they wick away excess moisture and help prevent root rot. After repotting, resist the urge to water right away. Give the roots about a week to settle and heal any breaks before you water lightly. This waiting period reduces the risk of rot and gives your succulent the best start.
Culinary Herbs
Herbs like basil, mint, and parsley respond beautifully to spring repotting. Use a nutrient-rich, well-draining potting mix to fuel their fast growth. After you’ve moved them into fresh soil, pinch back the growing tips—this encourages bushy, compact plants rather than leggy stems. Your herbs will reward you with a fuller shape and more leaves for cooking.
Climbing Plants and Vines
When upsizing pots for climbers such as sweet peas, morning glories, or jasmine, it’s the perfect time to add or upgrade a trellis. Insert the support into the new pot before you place the plant, so you don’t disturb the roots later. Handle the tendrils and stems gently—they can be fragile and snap if forced. Guide them loosely onto the trellis, and they’ll quickly find their way upward.
With a little extra care tailored to each plant type, your repotted succulents, herbs, and vines will settle in happily and grow stronger through the season.
FAQ
How often should I repot my balcony plants?
Most balcony plants benefit from repotting every 1–2 years, or when you notice roots circling the pot or poking out of drainage holes. Fast-growing herbs and annuals may need fresh soil annually, while succulents and slow growers can go longer. Spring is the ideal time to check and give your plants a roomier home.
Can I reuse old potting soil?
Yes, you can reuse it if you refresh it first—old soil can lose nutrients and may harbor pests or diseases. Remove any dead roots and debris, then mix it with fresh potting mix and a scoop of compost to restore structure and fertility. Avoid reusing soil from plants that were diseased to prevent spreading problems.
What size pot should I choose for repotting?
Pick a pot that’s about 1–2 inches wider in diameter for smaller plants, or 2–4 inches wider for larger ones. Going too big can hold excess moisture and lead to root rot, while a snug upgrade encourages healthy growth. Always choose a container with drainage holes to keep roots happy on your balcony.
Do I need to fertilize immediately after repotting?
No, it’s best to wait a couple of weeks before fertilizing. Fresh potting mix typically contains starter nutrients, and repotting can stress roots, making them sensitive to fertilizer burn. Once your plant shows new growth, you can introduce a gentle, balanced feed.
Can I repot a plant in the same container?
Absolutely—it’s a smart space-saving trick for small balconies. Gently remove the plant, trim back up to a third of the roots, and replant with fresh potting soil. This method refreshes the plant while keeping it in the same pot, controlling its size without needing more room.
What if my balcony plant is too big to repot?
If your plant is too large or unwieldy, top-dress it instead. Scoop out the top 2–3 inches of old soil and replace it with fresh compost or potting mix to replenish nutrients. You can also prune the roots and return it to the same container to manage size without a full repot.