Vintage Silverware Wind Chimes for a Musical Balcony Corner
Capture the nostalgic charm of vintage flatware and transform it into a functional piece of balcony art. This guide shows how to create a one-of-a-kind wind chime that produces gentle, tinkling notes—perfect for adding a sensory layer to small urban outdoor spaces. Appeal to thrifty, creative apartment dwellers looking to personalize their balcony on a budget.
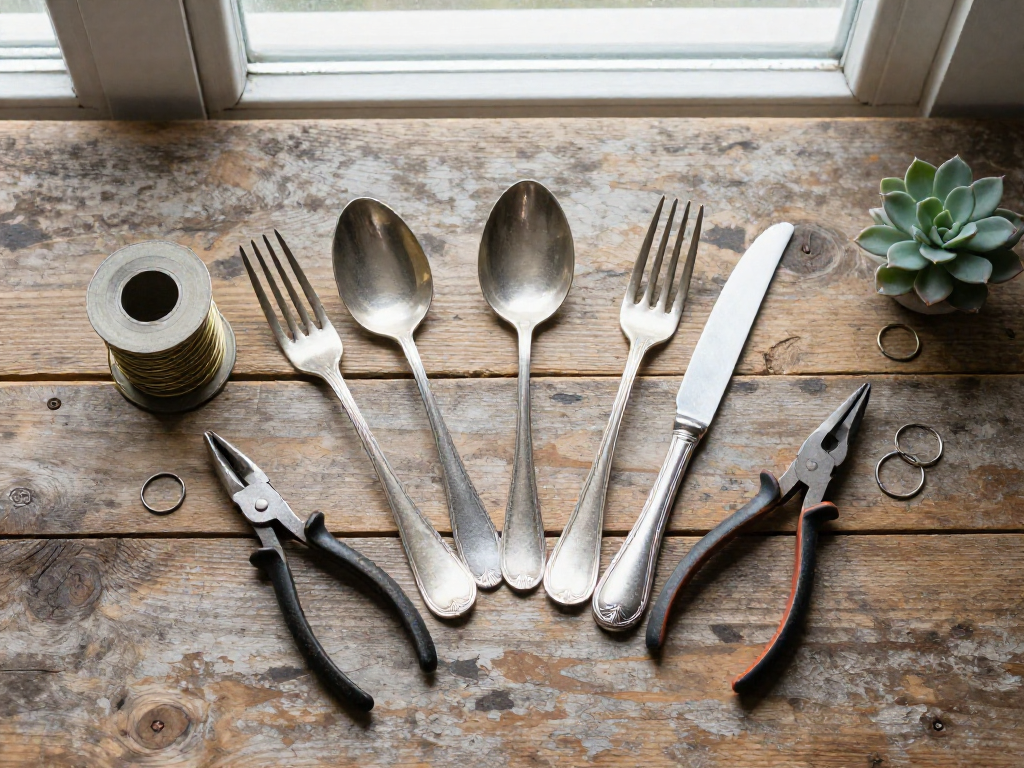
What You’ll Need
Before you start crafting, take a few minutes to gather your supplies. The beauty of this project is that most materials are either repurposed or easy to find. Here’s what you’ll want on hand:
- Vintage silverware – forks, spoons, and knives with character. Check thrift stores, flea markets, or even your own family stash. Mixing patterns adds charm, but any mixed-metal set will work.
- A way to make holes – a power drill with a small metal bit is fastest, but a hammer and a sharp nail can do the job with a bit of patience.
- Stringing material – heavy-gauge jewelry wire or fishing line. Both hold up well outdoors; wire gives a more rustic look, while clear line lets the silverware appear to float.
- Small connectors – split rings or tiny key rings let you attach each piece to the central hanger easily without tying knots that might slip.
- A central ring – this is what all the strands will hang from. An embroidery hoop, a metal bangle, a sturdy wire wreath form, or even a large key ring will work beautifully.
- Pliers – needle-nose pliers are perfect for twisting wire and opening split rings; standard pliers can help with any stubborn connections.
- Smoothing tools – sandpaper or a small metal file to soften any sharp edges left after drilling or hammering. This step is essential for safety.
- Optional outdoor sealant – a clear spray sealant can help protect your silverware from the elements, especially if your balcony gets direct rain. One or two light coats should do it.
Set everything out on a work surface before you begin. Having it all within reach will make the process smooth and enjoyable.
Prepping the Silverware
Before you start assembling your wind chimes, set aside some time to properly prep each piece of silverware. This step is crucial for both the look and the sound of your finished chime.
Start by giving all your forks, spoons, and butter knives a good wash in warm, soapy water. Removing any tarnish or residue ensures the metal is clean and ready for the next steps. Rinse well and dry thoroughly with a soft cloth to prevent water spots.
If you're working with silverware that has a curved handle or bowl, you might want to flatten it slightly for a sleeker appearance and easier drilling. Place the piece on a sturdy surface, like a workbench or a thick piece of scrap wood, and gently tap it with a rubber mallet. Work slowly and check your progress often—you're aiming for a gentle, even flatness, not a pancake. This is especially helpful for spoons that will hang vertically.
Now it's time to create a hole for hanging. Decide which end will be the top; typically you'll drill near the handle end, about ¼ to ½ inch from the tip. Mark the spot with a center punch or a sharp nail to keep your drill bit from wandering. Safety first: clamp the silverware to a wood block to secure it and protect your work surface. Wear safety glasses to shield your eyes from any metal shavings.
If you have a drill, use a high-speed steel or cobalt bit designed for metal. Start with a small pilot hole, then gradually move up to your desired size—usually around 1/8 inch is enough for a jump ring or fishing line. Drill slowly and apply steady, light pressure. If the metal heats up, pause and let it cool, or add a drop of cutting oil. Don't have a drill? You can also use a hammer and a sturdy nail: place the silverware on the wood block, position the nail on your marked point, and tap firmly until the nail pierces through. This method may take a little more elbow grease but works just fine.
Once all your holes are made, run your finger around each one to check for sharp edges or burrs. Take a piece of fine-grit sandpaper or a small metal file and gently smooth the rough spots. You want the holes to be clean so your hanging material doesn't fray or snag. A quick pass with the sandpaper over any other rough edges on the silverware is a good idea too.
With your silverware now clean, flattened (if needed), drilled, and deburred, you're ready to move on to stringing and assembling your wind chime. Each piece will catch the light and ring beautifully in the breeze.
How to Assemble the Wind Chime
With your silverware prepped and supplies ready, it’s time to bring the wind chime to life. Start by cutting several lengths of durable wire or clear fishing line, each about 12 to 18 inches long. The exact number depends on your design—aim for at least five pieces to create a full sound. Next, attach a small split ring to each utensil through the hole you drilled earlier. Split rings are easier to work with than directly tying the wire, and they let the silverware swing freely.
Thread one end of a wire through a split ring, then secure it tightly with a knot or a crimp bead. A double knot with a dab of clear glue works well for fishing line; if you’re using wire, a crimp and a pair of pliers will hold things in place. Repeat this for every piece of silverware.
Now, focus on the central hanging ring—a keychain ring or a small embroidery hoop works nicely. Take the free end of each wire and tie it to this ring, varying the attachment points around the circumference. This distributes the weight evenly and gives the chime a balanced, organic look when hung. To avoid a jumbled cluster, stagger the lengths: some utensils can hang closer to the top while others dangle lower, creating a multi-tiered effect that enhances both visual appeal and sound quality.
As you tie each piece, leave a little extra wire or line so you can make adjustments. Step back and check that the silverware isn’t touching—pieces should have enough room to sway without tangling. Once everything is attached, lift the chime gently by the central ring and give it a test. Tap the silverware with a spoon. You’re listening for clear, lingering tones. If a piece sounds dull or clunky, try shortening its line slightly or shifting its position to let it move more freely. Tune in small steps until the whole arrangement rings softly and musically. Finally, add an S-hook or a loop of strong cord to the top of the central ring for easy hanging on your balcony hook or tension rod.
Hanging & Styling on Your Balcony
Now that your vintage silverware wind chime is assembled, the fun of placing it begins. The perfect spot does more than just hold the chime—it helps your creation sing and sparkle.
First, look for where the breeze naturally flows. Corners where railings meet walls, open stretches along the railing, or underneath a small eave are often wind tunnels in miniature. Hang your chime where it will catch even a light puff, but not so exposed that it swings wildly. A gentle, musical tinkle is the goal.
Make sure your hanging hardware is up to the job. Choose a hook or plant bracket that’s rated for at least double the weight of your chime. Stainless steel or heavy-duty coated hooks resist rust and hold firm. If you’re attaching to a railing, use a clamp-style hanger designed for balconies—no drilling required.
Aim to hang the chime at eye level or just above. This height shows off the patterns in the silverware and catches sunlight beautifully. As the metal turns, it throws little flickers of light around your space, especially if your balcony faces south or west.
Layer the chime into your existing balcony style for even more charm. Try placing it near a cluster of hanging plants so the greenery frames the moving metal. String lights woven through the railing add a cozy glow at dusk, and the chime’s reflection amplifies the twinkle. A sheer outdoor curtain can soften the backdrop and make the silverware stand out like a piece of kinetic art.
Finally, think about bumps and blustery days. Position the chime so it has room to sway without hitting a wall or window. If your corner turns into a wind tunnel during storms, add a simple wind guard—a small panel or a few potted grasses nearby can break the gusts. This keeps your chime safe and its music gentle. With these tips, your balcony corner will feel like a tiny, personal sanctuary with a voice all its own.
Creative Twists & Care Tips
Now that your wind chime is assembled, it’s time to make it truly yours—and keep it singing through the seasons. Try threading colorful beads, old keys, or tiny charms between the silverware pieces. A few well-placed beads catch the light and add a layer of soft percussive rhythm. For a bolder look, paint the spoons and forks with outdoor enamel spray paint in colors that complement your balcony’s palette. A sunny yellow or deep teal can turn humble flatware into a statement piece.
Mixing metals offers another path to personalization. Pair silver-plated forks with copper or brass spoons to create a richer blend of tones. The different densities produce a more complex chime, and the visual contrast is striking. Before you hang anything outside, protect your creation from moisture. Apply a clear, rust-inhibiting sealant to all metal surfaces—even stainless steel can pit over time if rain is frequent. This simple step dramatically extends the life of your chime.
Once your wind chime is up, mark your calendar for a quick monthly check. Test the hanging wire and each connection point; if anything feels loose, tighten it gently with pliers. Listen for any dull thuds instead of clear rings, as this can signal a loose knot. When winter arrives with freezing temperatures and harsh winds, bring the entire chime indoors. Storing it in a dry place during the off-season prevents unseen stress on the wires and keeps the finish intact for many sunny balcony days ahead.
FAQ
What kind of sound do silverware wind chimes make?
Silverware wind chimes produce soft, tinkling tones that are more melodic and varied than typical metal chimes. The different shapes and weights of spoons and forks create a gentle, whimsical harmony perfect for a relaxing balcony corner.
Will the silverware rust on my balcony?
If you use stainless steel utensils, they are highly rust-resistant and can withstand outdoor conditions. To ensure longevity, you can apply a clear outdoor sealant and bring the chime inside during harsh winter weather.
Can I use plastic utensils instead?
Yes, plastic utensils are a lightweight, rust-proof alternative, though they won't produce the same resonant sound. They'll create a softer, clattering noise and can be painted for a fun, colorful look.
How do I keep the wind chime from tangling?
Secure each utensil with a separate string or fishing line tied to a central ring, spacing them evenly. Use a swivel hook at the top to allow the entire chime to rotate freely without twisting.
Where is the best place to hang a wind chime on a small balcony?
Hang it in a spot with gentle airflow, such as near the railing or in a corner where breezes pass, but away from seating areas if you prefer a softer sound. Avoid placing it too close to walls, which can dampen the chime's movement and sound.
What if my drill can’t go through the silverware?
Use a metal hole punch or a hammer and nail to create a starting indent, then drill with a bit designed for metal. If stainless steel is too tough, try thinner or vintage silver-plated utensils, which are softer.
Is this project safe around birds or pets?
Keep the chime free of small, detachable parts that could be swallowed, and avoid using sharp edges. Place it out of reach of curious pets, and monitor birds—if they show interest, relocate the chime to a less accessible spot.